Creating a Tournament
Steps to create a tournament are listed below:
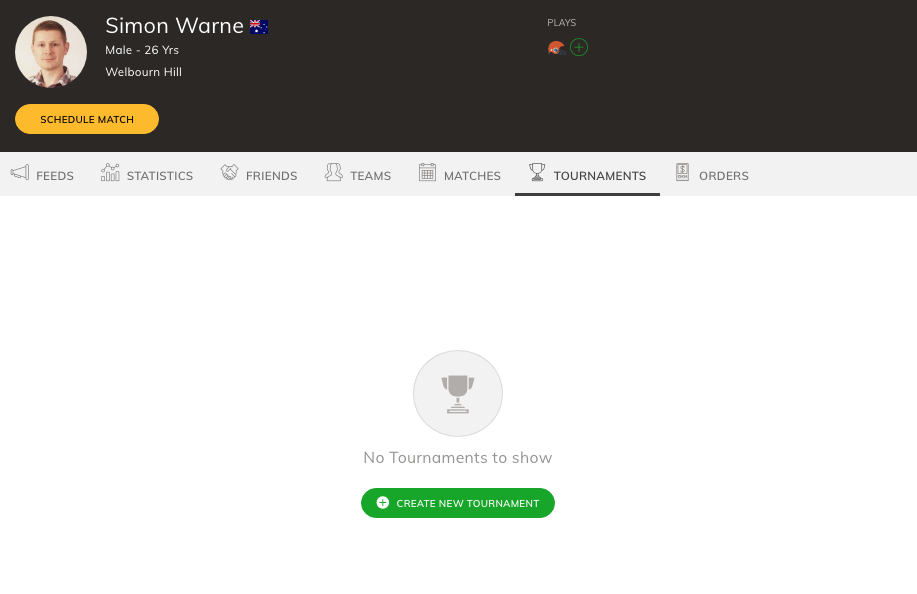
Step 2: At the top of your profile page you can find tabs such as Tournaments, Matches, and Teams. Click on tournament subtab.
Step 3: Click on Create tournament button.
Step 4: A box titled “Create Tournament” appears which requests you to fill in the tournament name.
Step 5: Fill the tournament name and click on the “Create tournament” button in the pop-up.

Step 6: Tournament will be created and it will navigate to the tournament settings page which will be in the unpublished state initially.
Step 7: Upload Tournament image on the left bar given before Tournament name and then go to the “settings” tab and configure your tournament the way you want.

Note: To publish a tournament, all 4 steps needed to be completed on the settings page.
1. Basic information :
Step 1.1: Information - You can change the tournament name if needed in the tournament name field.
Step 1.3: Timeline - Give tournament Start date, end date, due date and due time on tournament timeline.
The tournament start date indicates the starting date of a tournament.
The end date indicates the ending date of a tournament.
Due date indicates until when the participants can able to apply.
Due time is until what time on the due date the application will be open. Note: Filling due time is not a mandatory field here.
Step 1.4: Venue - To add tournament venue click on Add venues button.
A pop-up title Add Venue will be opened. You can search and select Playinga venues that are already created (or) can create a new venue.
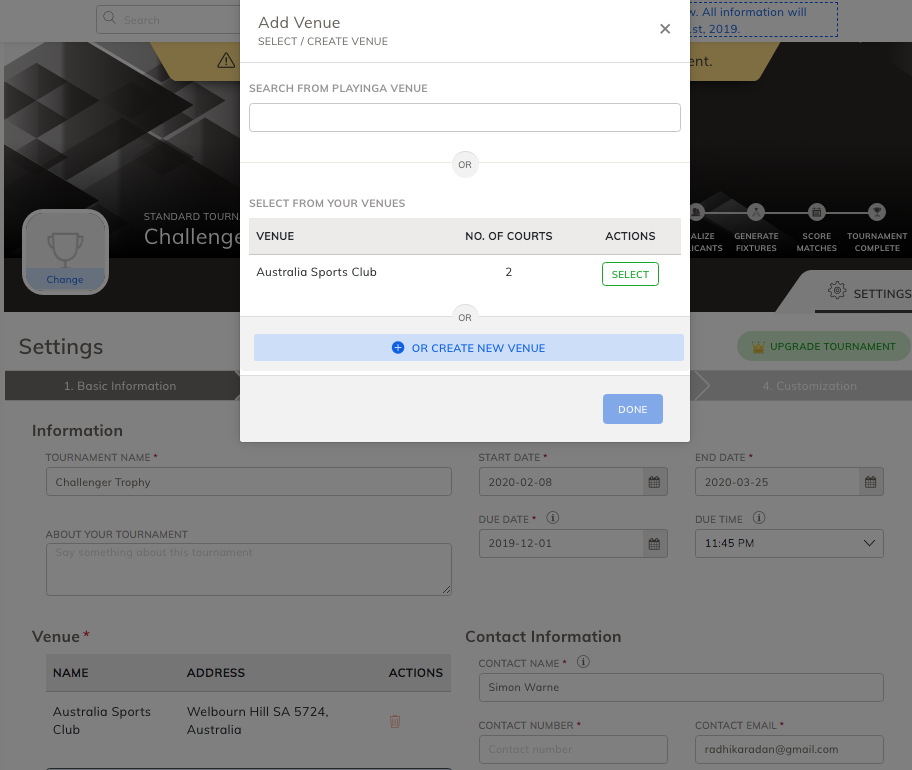
Step 1.5: Click on create new venue button.
Step 1.6: Create your own venue pop up will head up. Fill venue name, Select the exact location on the map, Venue opening time and closing time along with venue court
( you can add any number of courts with a unique name.)
Step 1.7: Click on Create venue and Proceed button.

Thus the venue will be created and added.
Step 1.8: Contact Information - Type contact name, contact email and contact number in Contact information fields.
Step 1.9: Address - To enter an address, click on the edit icon near the address and select the location on the map.
If you choose a location on the map, then City, State, and country will be prefilled.
Step 1.10: Secondary Contact Information - Give additional contact information if needed to be shown on the tournament page.
You can add any number of secondary information by clicking on the + icon provided.
Step 1.11: Social Icons- Give URL link of facebook, twitter and website if needed.
Step 1.12: After filling all the mandatory information click on save and proceed button.
Note: you can also save the information as a draft in between.
2: Divisions - You can add any number of sports which PLAYINGA provides. And for a sport, you can add multiple divisions :
Step 2.1: Add Sport - click on select your sports dropdown. It will show a list of sports PLAYINGA supports.

Step 2.2: Choose any sport from the dropdown. Divisions settings will be shown for the selected sport.
Step 2.3: You can set division name, format, maximum number of teams, gender, minimum and maximum players required and Players born after year on the division settings.
Step 2.3: If you want to add another division for the same sport, click on Add another division button.
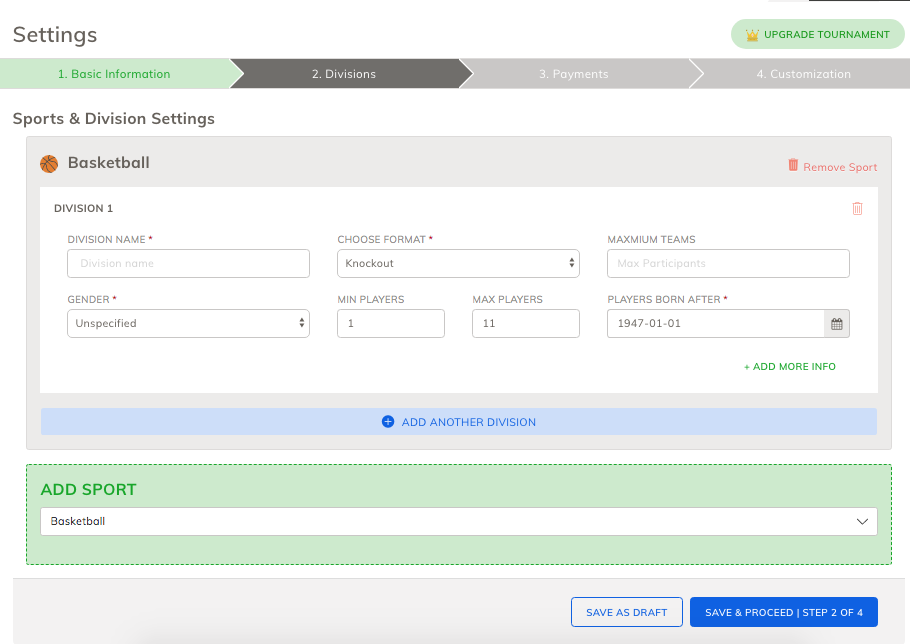
Step 2.4: It will create another division settings and the same way can add multiple divisions.
Step 2.5: To add another sport, click on "add sports" dropdown and it will show a list of sports. Choose any sport and start creating divisions.
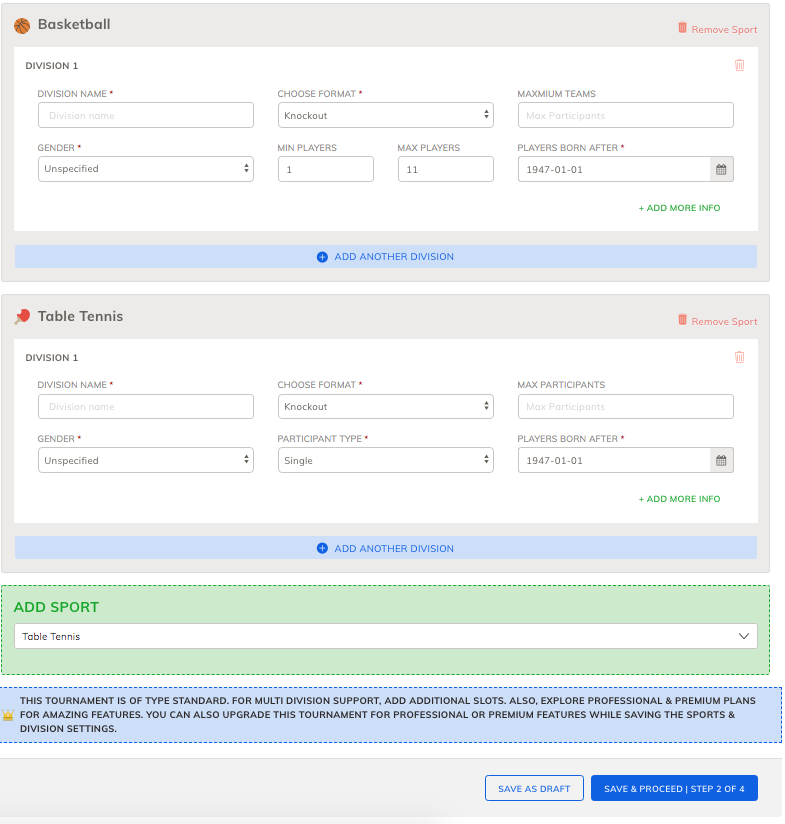
Step 2.6: After adding sports and divisions click on Save & Proceed button.
Note: PLAYINGA allows only one sport and division for free. to add more division and sports, you have to upgrade tournament.
Step 2.7: Payment gateway will be opened and you may choose the plan needed and proceed with the payment.
Step 2.8: After upgrade, divisions will be created and goes to the next step "Payment".
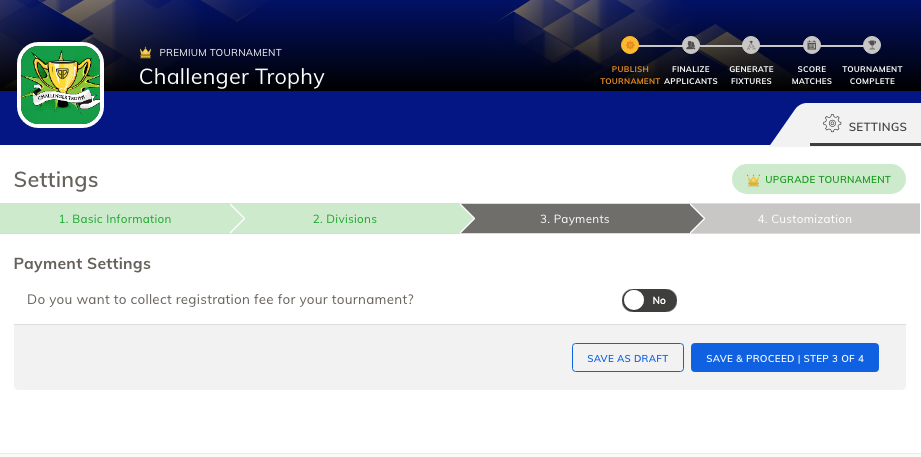
3. Payment :
If your tournament is updated, you can able to set tournament entry fee, division level fee, any other additional fee and collect it both online and offline.
Note - The payment page will be enabled only if your tournament is upgraded.
Step 3.1: If you want to collect the registration fee, click on yes.
Step 3.2: A payment settings page will be opened.
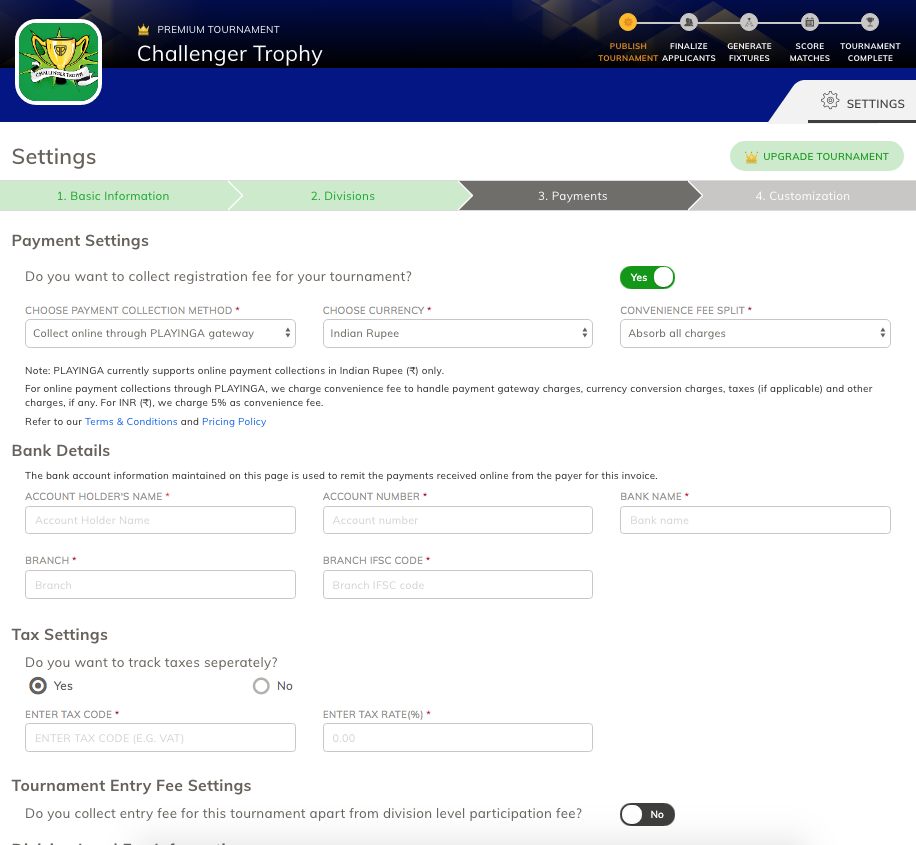
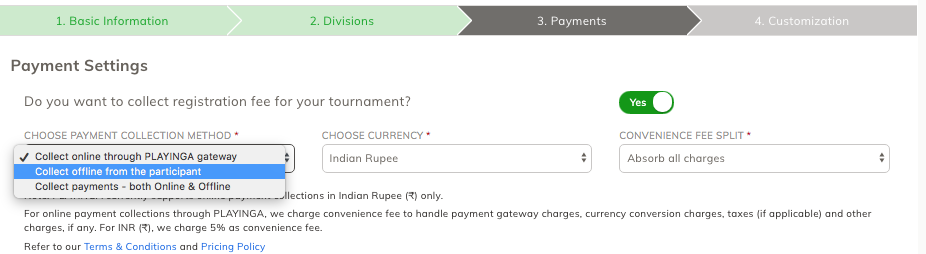
Step 3.3: Click on the payment collection method to choose the format. You can choose any of the 3 options provided in the dropdown.
Step 3.4: As of now, PLAYNGA supports only Indian Currency.
Step 3.5: Click on the convenience fee dropdown. you may see 3 options.
Absorb all charges- convenience fee will be paid by a Tournament admin
Pass on charges to the payer - payer will pay the convenience charge along with the fee.
Split charges: 50% - 50% - Tournament admin and payer pays 50%- 50% of the total convenience fee.
Bank details :
In this stage, the organizer maintains the bank account information on the Tournament Info page. The information is stored securely and is not visible to Tournament participants and visitors. The information maintained on this page is used to remit the payments received online as registration fees.
Step 3.6: Capture the organizer’s bank account information in the Bank Details section.
This section is visible only if Collect Payment Online toggle is chosen. This section is critical.
Kindly ensure you provide the correct bank account number, Bank Name, Account Holder’s name as mentioned in the bank records, Branch and IFSC Code. IFSC code is relevant only if you are transacting in INR.
We shall be using these details to remit the collected fees to the organizer’s bank account.

Note: Bank details provided will be kept confidential in PLAYINGA.
Tax Settings :
Step 3.7: If you want to track Tax separately, click on Yes and enter tax code and tax rate in percentage.
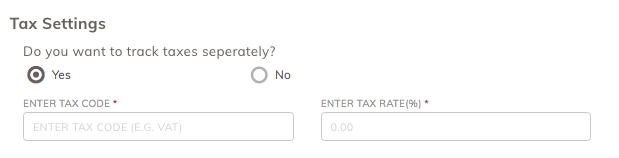
Step 3.8: If taxes need not be set click on no and proceed to the next step
Tournament Entry Fee and Division Level Fee -
Step 3.8: If you want to collect entry fees for tournament click yes.
Step 3.9: Enter the entry fee amount and set early bird discount if needed.
If you are providing discounts for early bird registrations, choose the right condition in the Early Bird Discount field. You can provide early-bird discounts by date or by the number of registrations. Choosing “Based on Date” will help you to offer a discount till a particular date and choosing “No. of participants” will help you to offer a discount for the first N number of participants. Capture this condition and discount amount. It is not mandatory to provide a discount for a tournament.

Step 3.10: If no need to collect tournament entry fees, click no and proceed with the next step.
Step 3.11: Set fee to be collected for each division in the division level entry fee.
Enter the entry fee and set an early bird discount if needed.

Add ons :
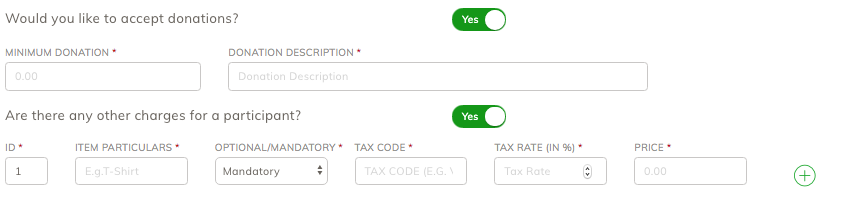
Step 3.12: You can collect the donation amount for any cause and if you want to enable a click on yes.
Step 3.13: Enter the minimum donation amount to be collected and Description.

Step 3.14: If you want to collect a fee from payers for any reason other than the entry fee, you can enable this option and provide the information.
You can add any number of other fees to be collected through the + icon provided.
step 3.15: After completing all the steps, Click on Save and Proceed. It will take you to the final page where you can publish the tournament.
NOTE: Settlements To Tournament Organizers
All payments made will be consolidated and remitted to the tournament organizer within 5 business days from the date of finalizing participants by the organizer.
For pricing related queries, please visit our Pricing page.
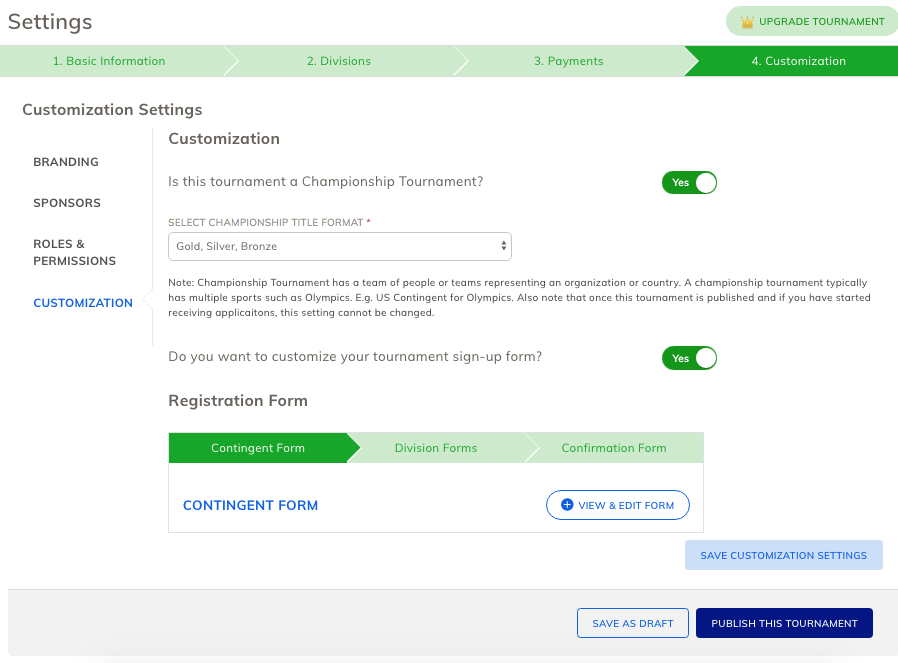
4. Customization settings :
This page allows you to custom your tournament with banner image, color, adding sponsor info, editing registration form and so on.
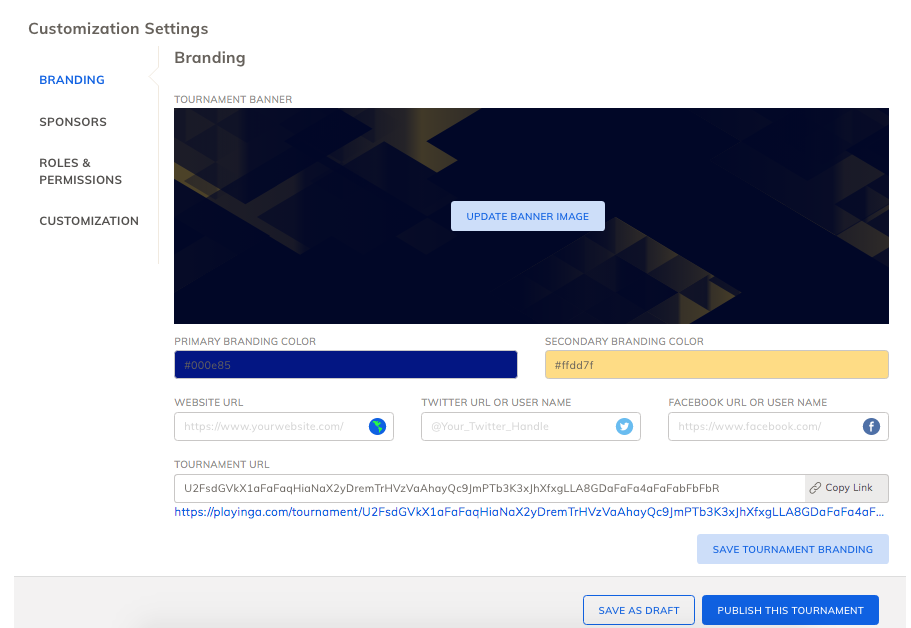
4.1 Branding :
Step 4.1: Click on the update banner image, choose an image from your computer and upload it.
Step 4.2: Choose Primary and Secondary color for your tournament to create brand color. (Note: If you Update banner image then the color will not be visible on header banner, Image you uploaded will cover it)
Step 4.3: Type or copy-paste your team website URL, twitter account and facebook account to make the player and organizers know more about your tournament.
Step 4.4: Change tournament URL if needed.
Step 4.5: Click on the save tournament branding button.
4.2: Sponsors-
To add sponsor information click on Sponsor heading.
Step 4.6: If you want to capture tournament sponsor information. click on yes and click on Add sponsor button.

Step 4.7: A form titled sponsors will head up and upload an image if needed. Fill sponsor category, sponsor name, sponsor URL and mention if title sponsor.
Step 4.8: Click on the Save button.
You can add any number of sponsor information through the add sponsor button provided.

4.3: Roles and Responsibilities -
Step 4.9: click on the role and Responsibilities heading on the left side.
Note: If your an admin, your name will be visible under the Administration role. The Participant list includes players who are already part of the tournament.
Understanding Participant role-
Step 4.10: Go to the Player edit and read all the actions. Anything cannot be disabled or enabled in the Participant role.
If a participant gets assigned for any other role, their name will be removed from the Participant role.
To Add Participants as Admin -
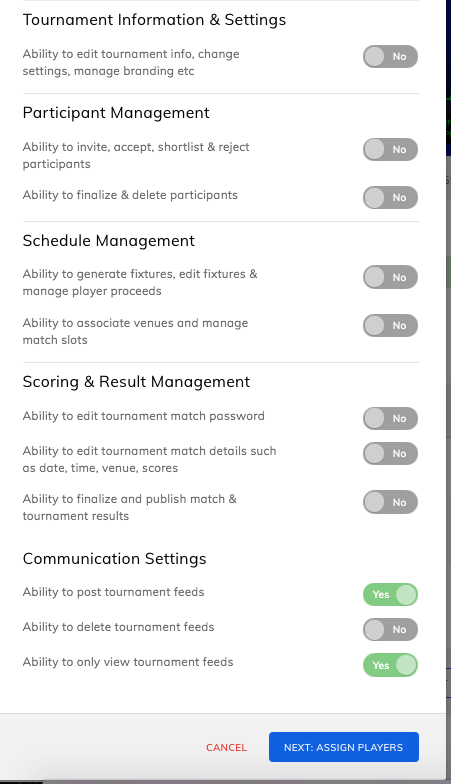
Step 4.11: Click on the Edit icon in the Administrator row.
Step 4.12: Read what all an admin can do and click the "Next: Assign Players" button.
Note: You cant disable or enable any actions in this pop-up.
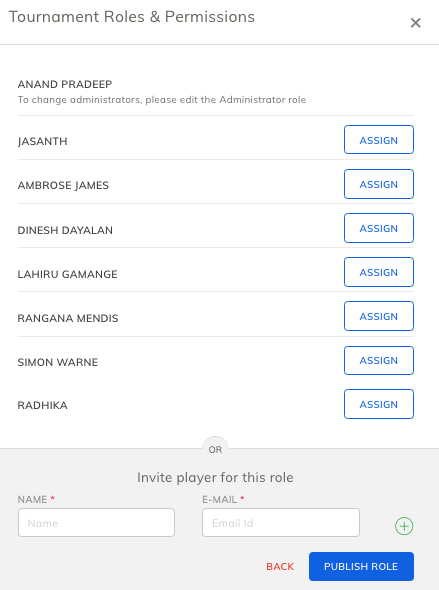
Step 4.13: List of confirmed players will be shown. Click on the Assign button corresponding to the Player profile on whom you want to make Admin.

Step 4.14: Click on publish role button. The assigned player will now be added as Admin and can able to do all actions which are mentioned in the admin role.
Create a new role -
As an admin, you can create new role and assign players to it.
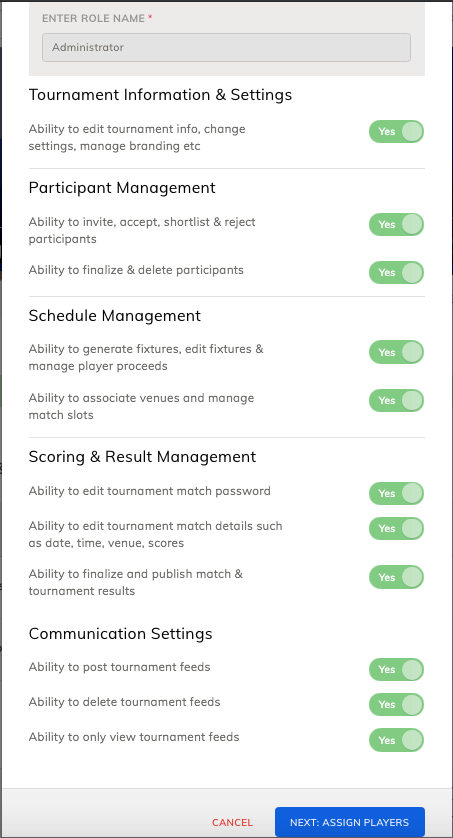
Step 4.15: Click on the "Create New Role" button on top of the roles list.

Step 4.16: Enter the Role name and enable the characteristics of the role.
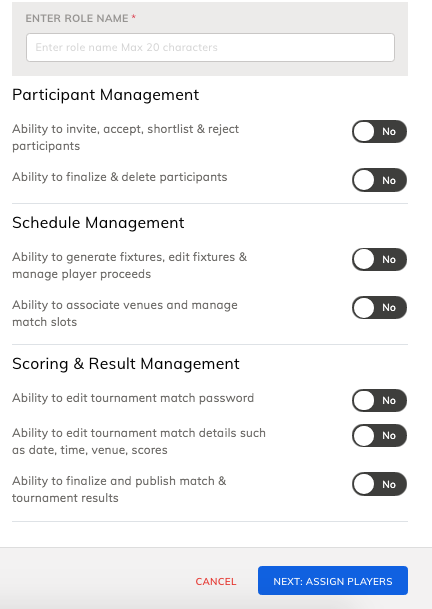
Step 4.17: Click on "Next: Assing Players" and Assign players to the created role and Click on the "Publish Role" button.
Deleting new role created -
Step 4.18: Under the Actions on the role created, you can find the Delete icon. Click on it and a confirmation pop up will appear.

Step 4.15: Confirm with the Yes button and the role will be deleted.
Customization/Editing/ Setting up Registration form:
As tournament admin, you can customize sign up forms and set whether a tournament is championship tournament or not.

Step 4.16: If you want this tournament to be a championship tournament, click on yes and select Championship title format.
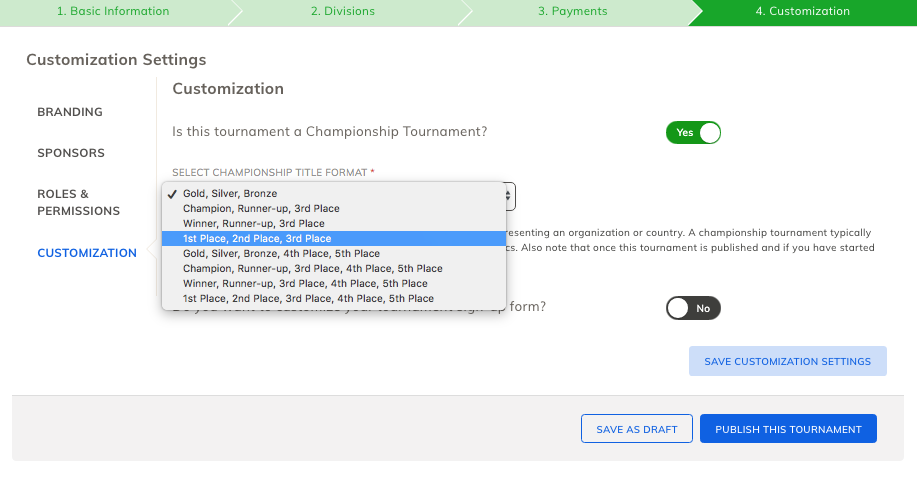
Note: If tournament need not be championship tournament leave it as No and proceed.
Step 4.17: If you want to customize tournament sign up form click yes.
Step 4.18: If your tournament is a championship tournament, You will happen to see the contingent form, Division form, and customization form edit.
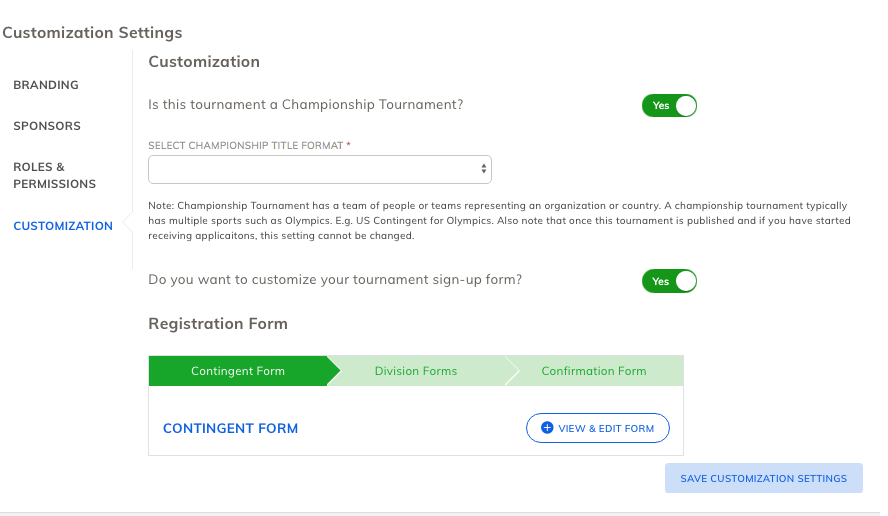
Note: If non championship tournament: the Contingent form will not be visible.
Step 4.19: To edit contingent form, click on edit and view button respective to contingent form.
A form with few data will be shown. if you want to edit the form click on Edit form button.

Step 4.20: You can add and edit any number of fields with field names and types. You can also set whether this field needs to be filed mandatory or not.
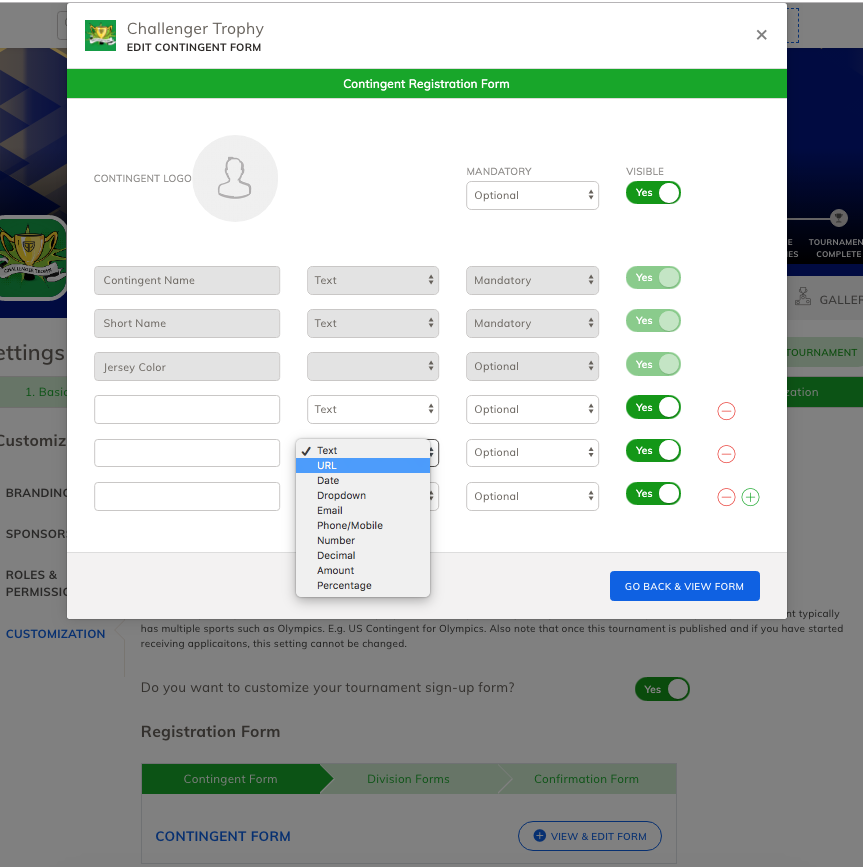
Step 4.21: If the form is customized click on Go back and view form, preview the form and click on save and close.

The updated form will be saved.
Step 4.22: To edit divisions form - click on Divisions form.
Step 4.23: Choose the division in which you want to edit form and click on View and Edit form.

A form with few data will be shown. if you want to edit the form click on Edit form button.
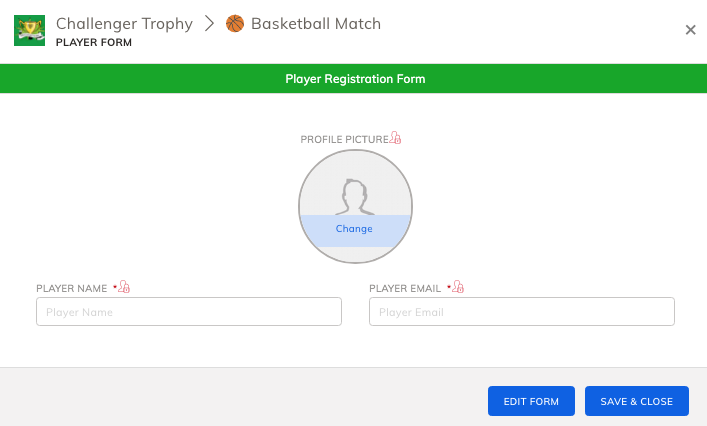
Step 4.24: You can add and edit any number of fields with field names and types. You can also set whether this field needs to be filed mandatory or not.

Step 4.25: If the form is customized click on Go back and view form, preview the form and click on save and close.
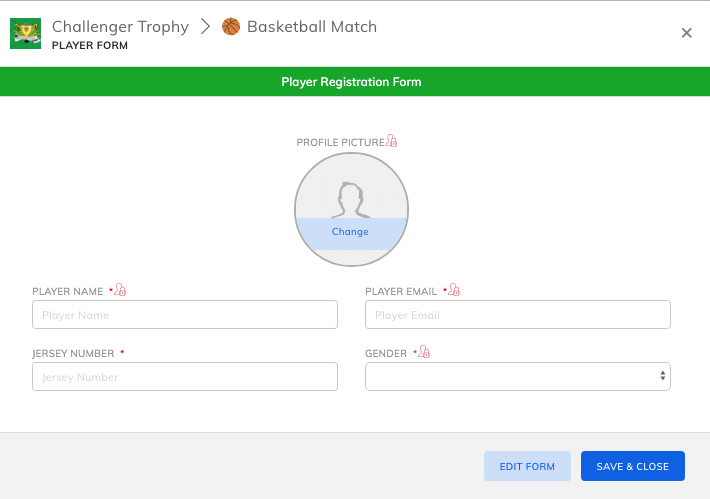
The updated division form will be saved.
Step 4.26: To edit Confirmation form click on the Confirmation Form.
Default text will be visible, to edit confirmation text, click on the edit icon provided.

Step 13: Type the changes and click on Save changes button.

Step 4.27: If all the Forms are customized click on Save customization settings button.
Thus all the changes on the customization page will be saved.
Step 4.28: To Publish the tournament Click on the "Publish this tournament" button.
The tournament will be published and it will redirect you to the tournament feeds page.
Connect On Social Media
Connect with us on facebook, twitter and linkedin


Schedule A Free Demo
Seeing is believing: Book your FREE PLAYINGA demo today.
Related Articles
Setup a Championship Tournament (Contingent)
Tournament organizers can decide whether the tournament should be a championship tournament or a nonchampionship tournament. Note: Once the tournament is published, you cannot change tournament type. So setting up tournament type can only be done ...Tournament Standing
As the tournament progresses, the Tournament Administrator records the results of each and every match in the tournament. When the administrator publishes the results of a match, the tournament standing of the player or team involved reflects ...Upgrade Tournament
Initially, the tournament created will be of standard type. To unlock all the tournament features, you can upgrade it to Professional or Premium. In this session, you will see how to upgrade and what are the advantages. Step 1: click on "Upgrade ...Tournament Progression
Once the tournament fixtures are generated, a match page gets created for each fixture. Only the tournament administrator can enter the scores for each match fixture. As the tournament progress and as the tournament administrator enters the scores of ...Tournament Feeds
Once you schedule a tournament on PLAYINGA, as an organizer you can use your Tournament Feeds page to keep participant players or teams informed and fans of your tournament engaged through text or media clips. Tournament feeds that you create through ...
Announcements
Welcome to Community
The Community hub inside Zoho Support lets you build a powerful community around your business, while still serving customers via other channels. Your customers can post 4 types of content within your community. These are Ideas, Questions, Problems and Discussions. Each of these serves a particular purpose. When your customers have something to discuss with you, they can post a discussion within your community. It's a great way to debate and collaborate. Your customers can ask you specific questions

Service Request
If you can't find the answer to your questions in our resources, submit a ticket and we will get in touch with you.